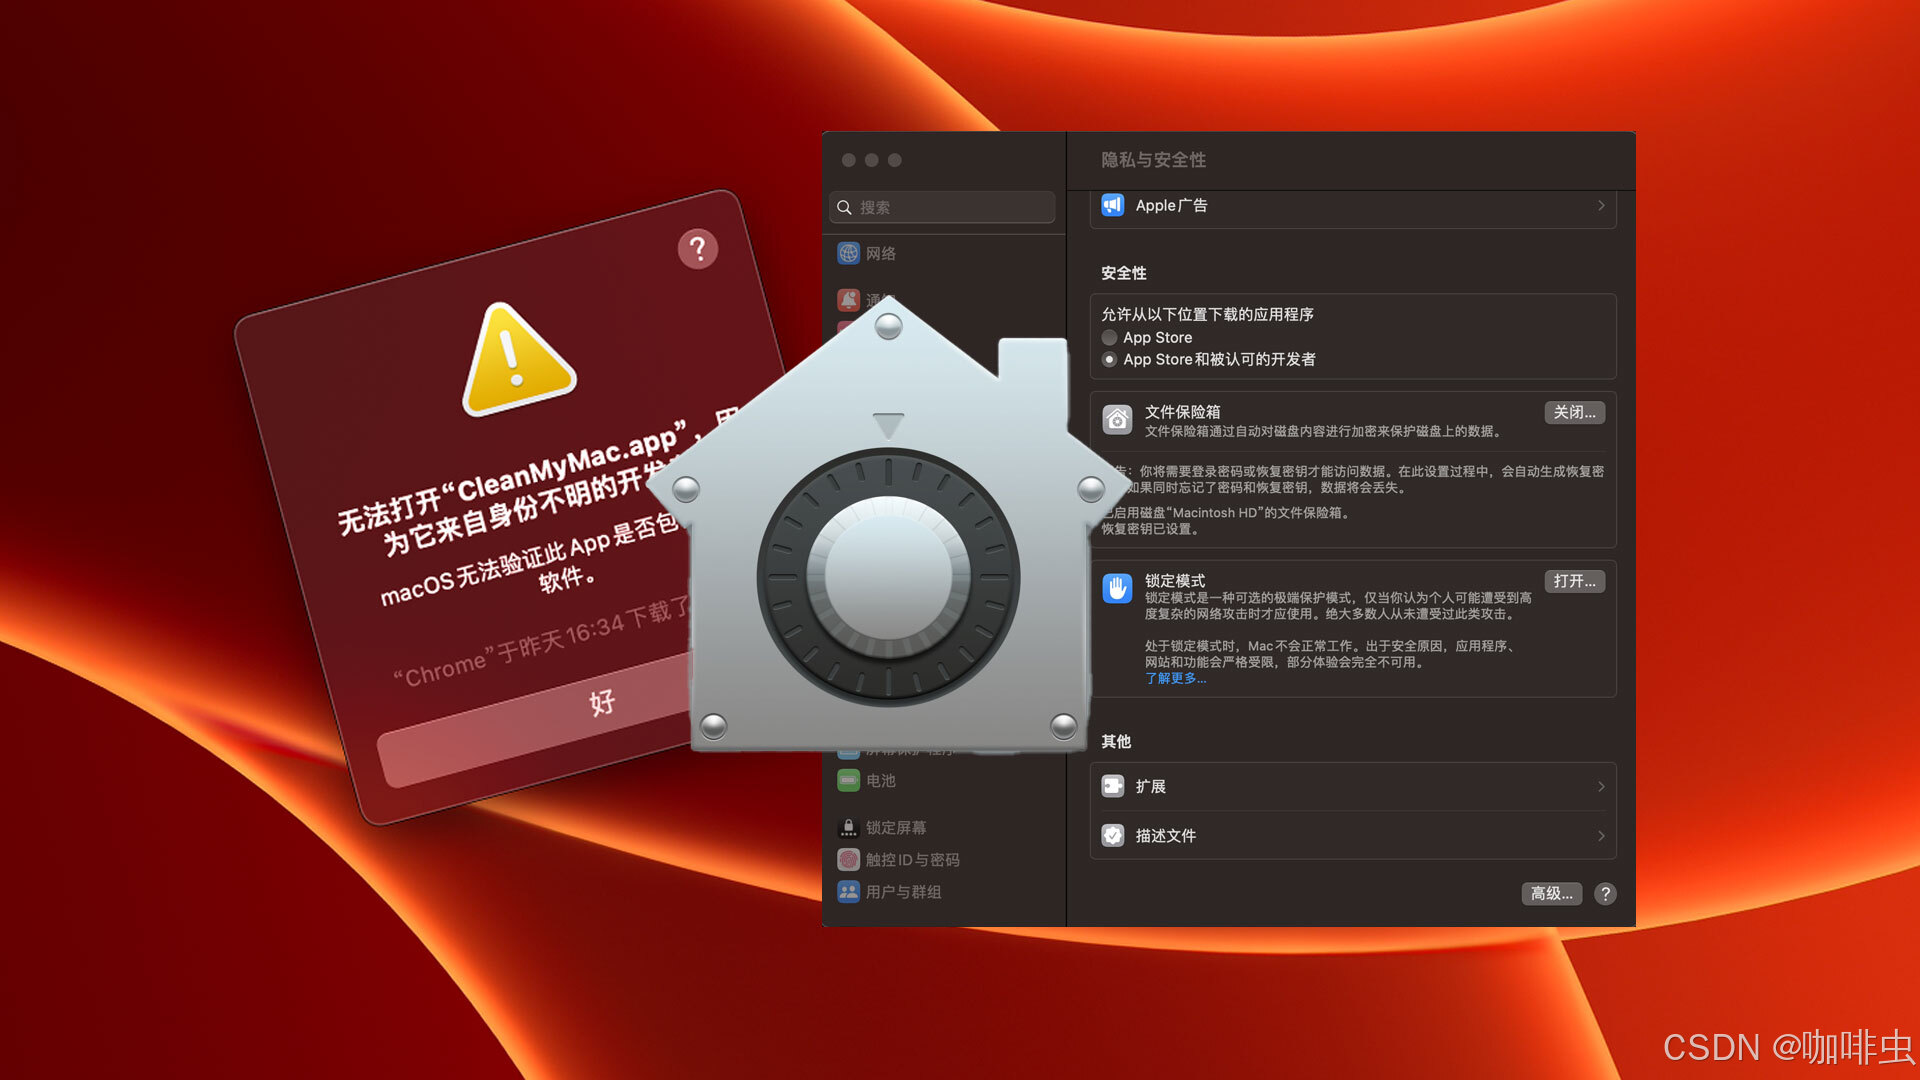
macOS Gatekeeper is a security feature designed to protect your Mac from malicious software. It does that by restricting which apps can run based on where they come from and whether Apple recognizes the developer.
Most of the time, that protection is useful. But in some situations, you may need to install software from outside the App Store or from an unsigned developer. In those cases, you might want to temporarily disable Gatekeeper from the command line.
This guide explains what Gatekeeper is, why someone might unlock it, how to do it with spctl, and how to restore the default protection afterward.
1. What is Gatekeeper?
Gatekeeper is a built-in macOS security mechanism that blocks apps Apple does not trust. By default, macOS prefers software from:
- the Mac App Store
- developers signed with an Apple Developer ID
That default helps prevent accidental installation of malware or tampered software.
2. Why would you unlock Gatekeeper?
In normal use, Gatekeeper improves security. Still, there are some cases where bypassing it makes sense:
-
Installing a specific third-party tool
Some open-source apps, internal tools, or software from independent developers may not be notarized by Apple even if you trust them. -
Development and testing
If you build your own app, Gatekeeper may block it while you are testing unsigned or not-yet-notarized builds. -
More flexibility for advanced users
Some users intentionally install software outside the App Store ecosystem because they need tools Apple does not distribute.
3. Disable Gatekeeper from the command line
If you decide to bypass Gatekeeper, Terminal gives you two common options.
3.1 Disable the main Gatekeeper check with --master-disable
This command disables the main source validation and allows apps from anywhere.
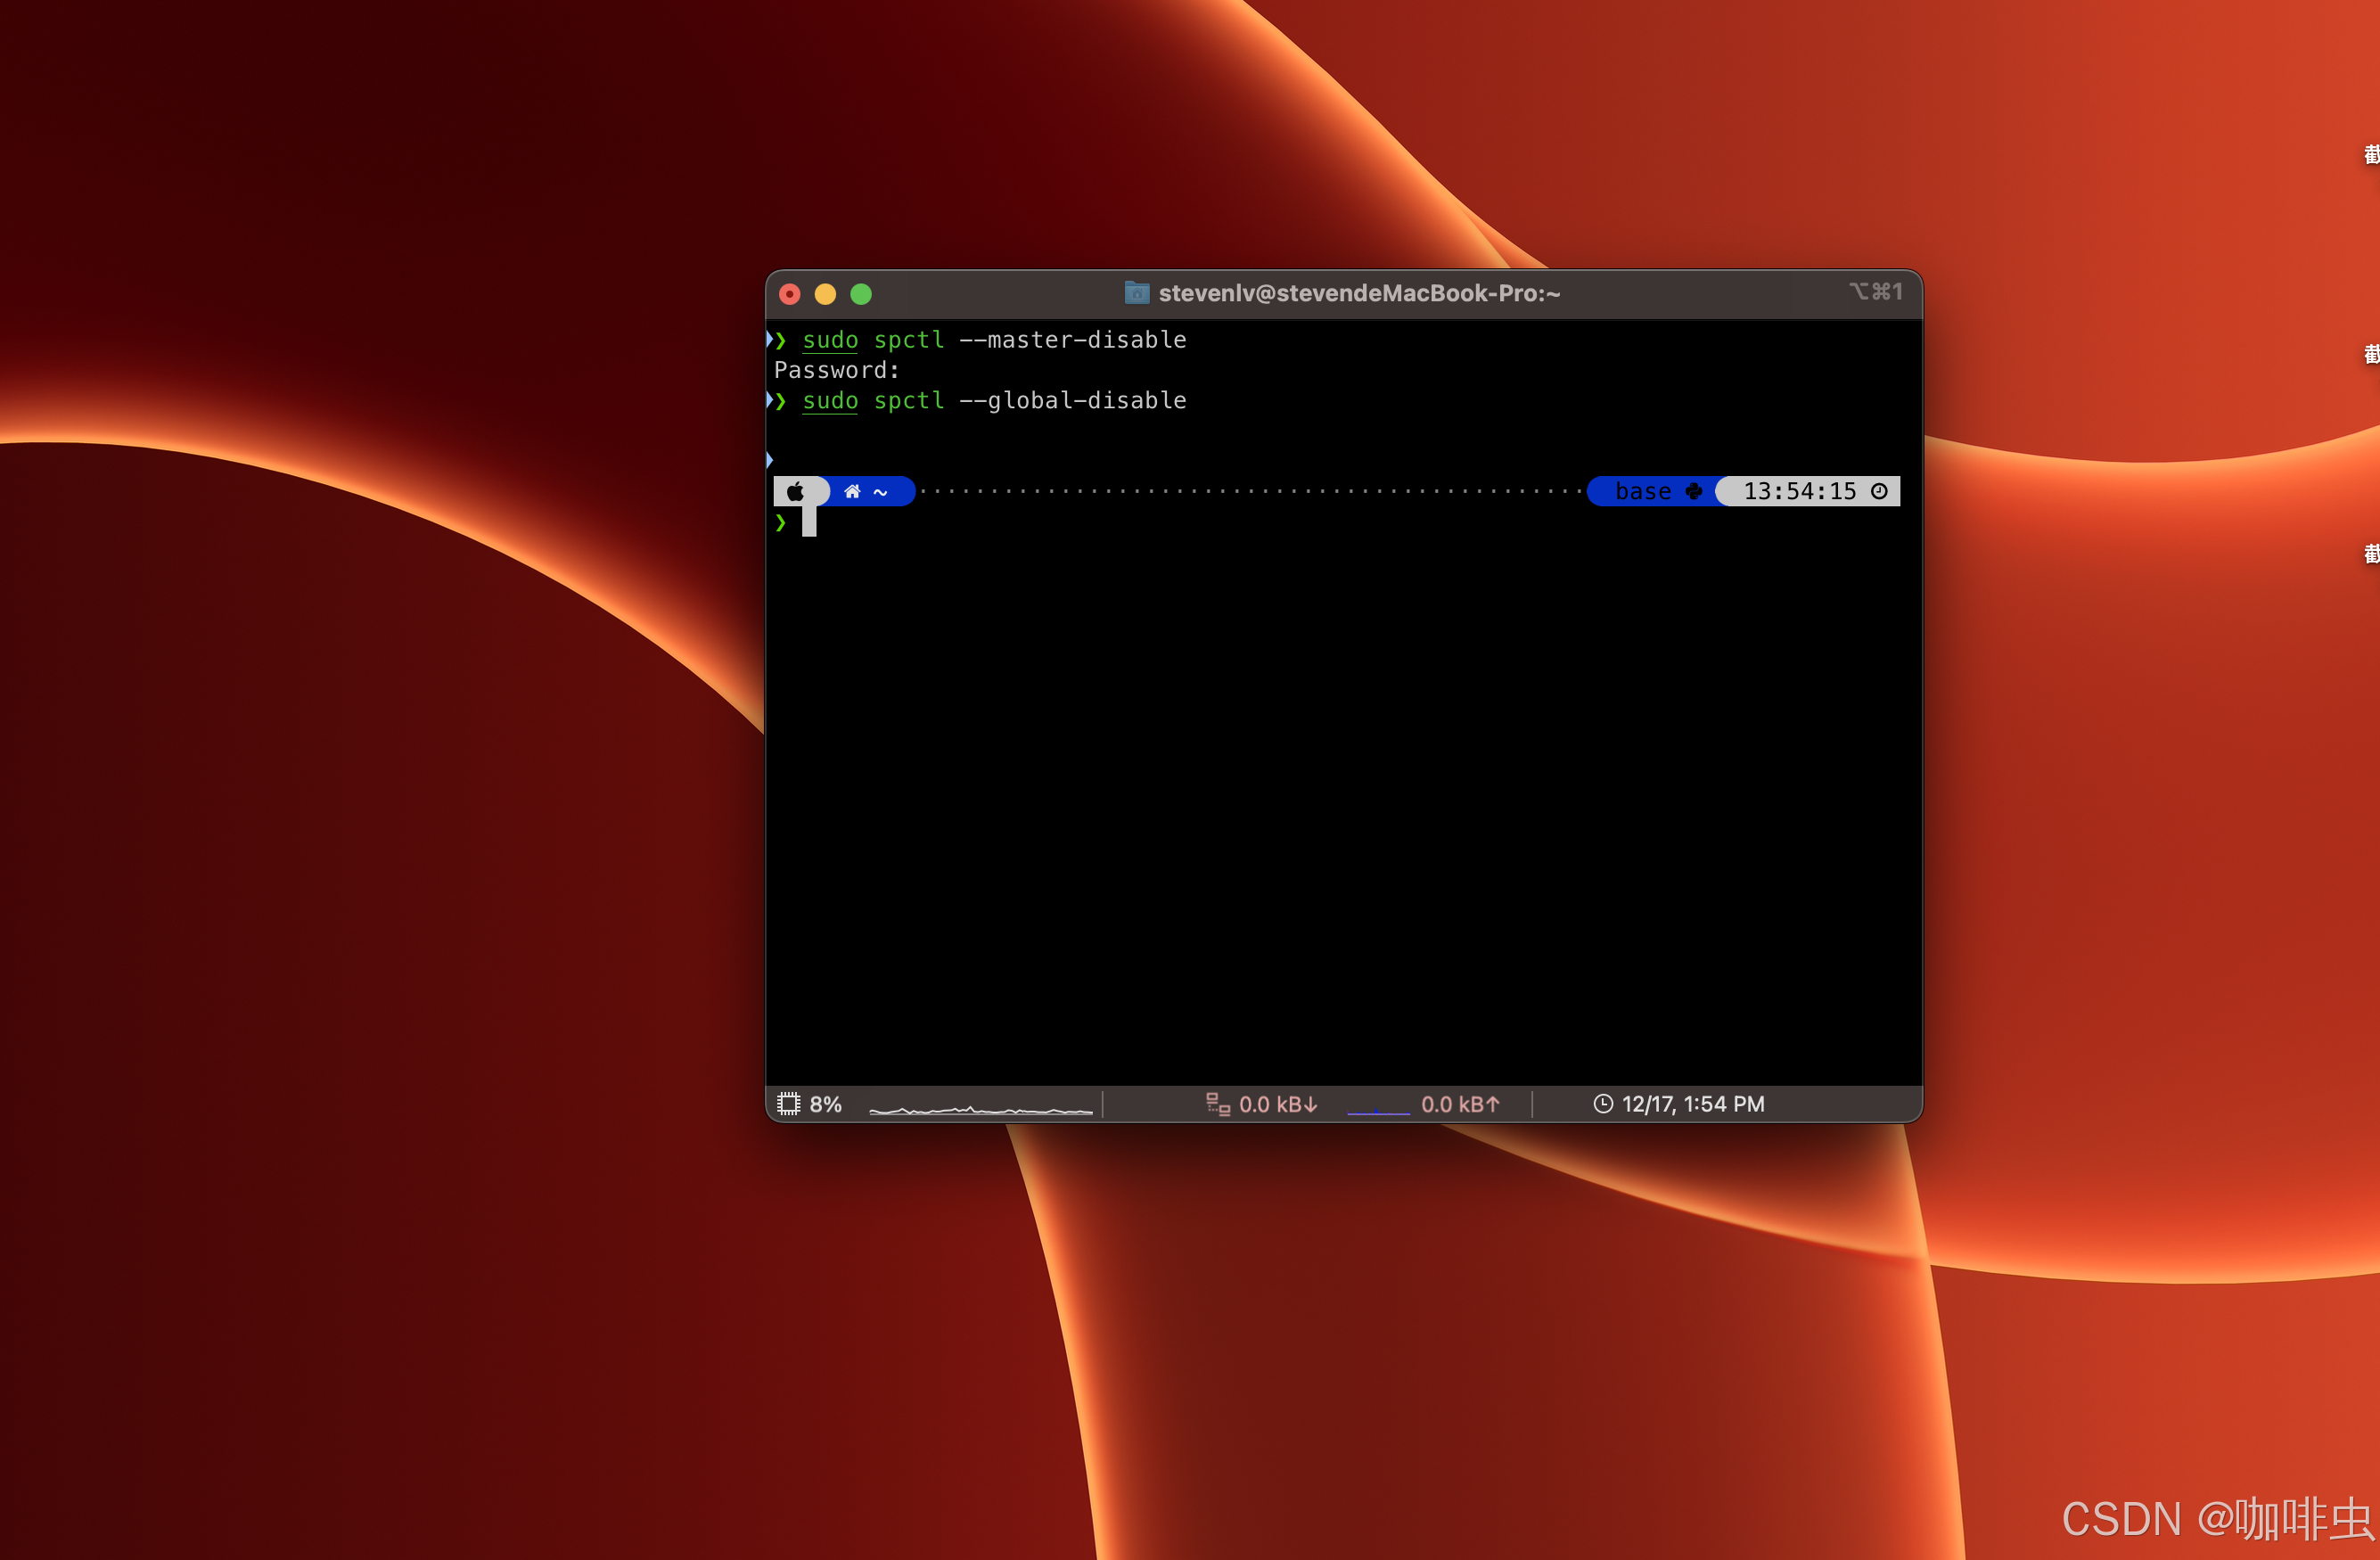
First, open Terminal, then run:
sudo spctl --master-disable
You will be prompted for your administrator password.
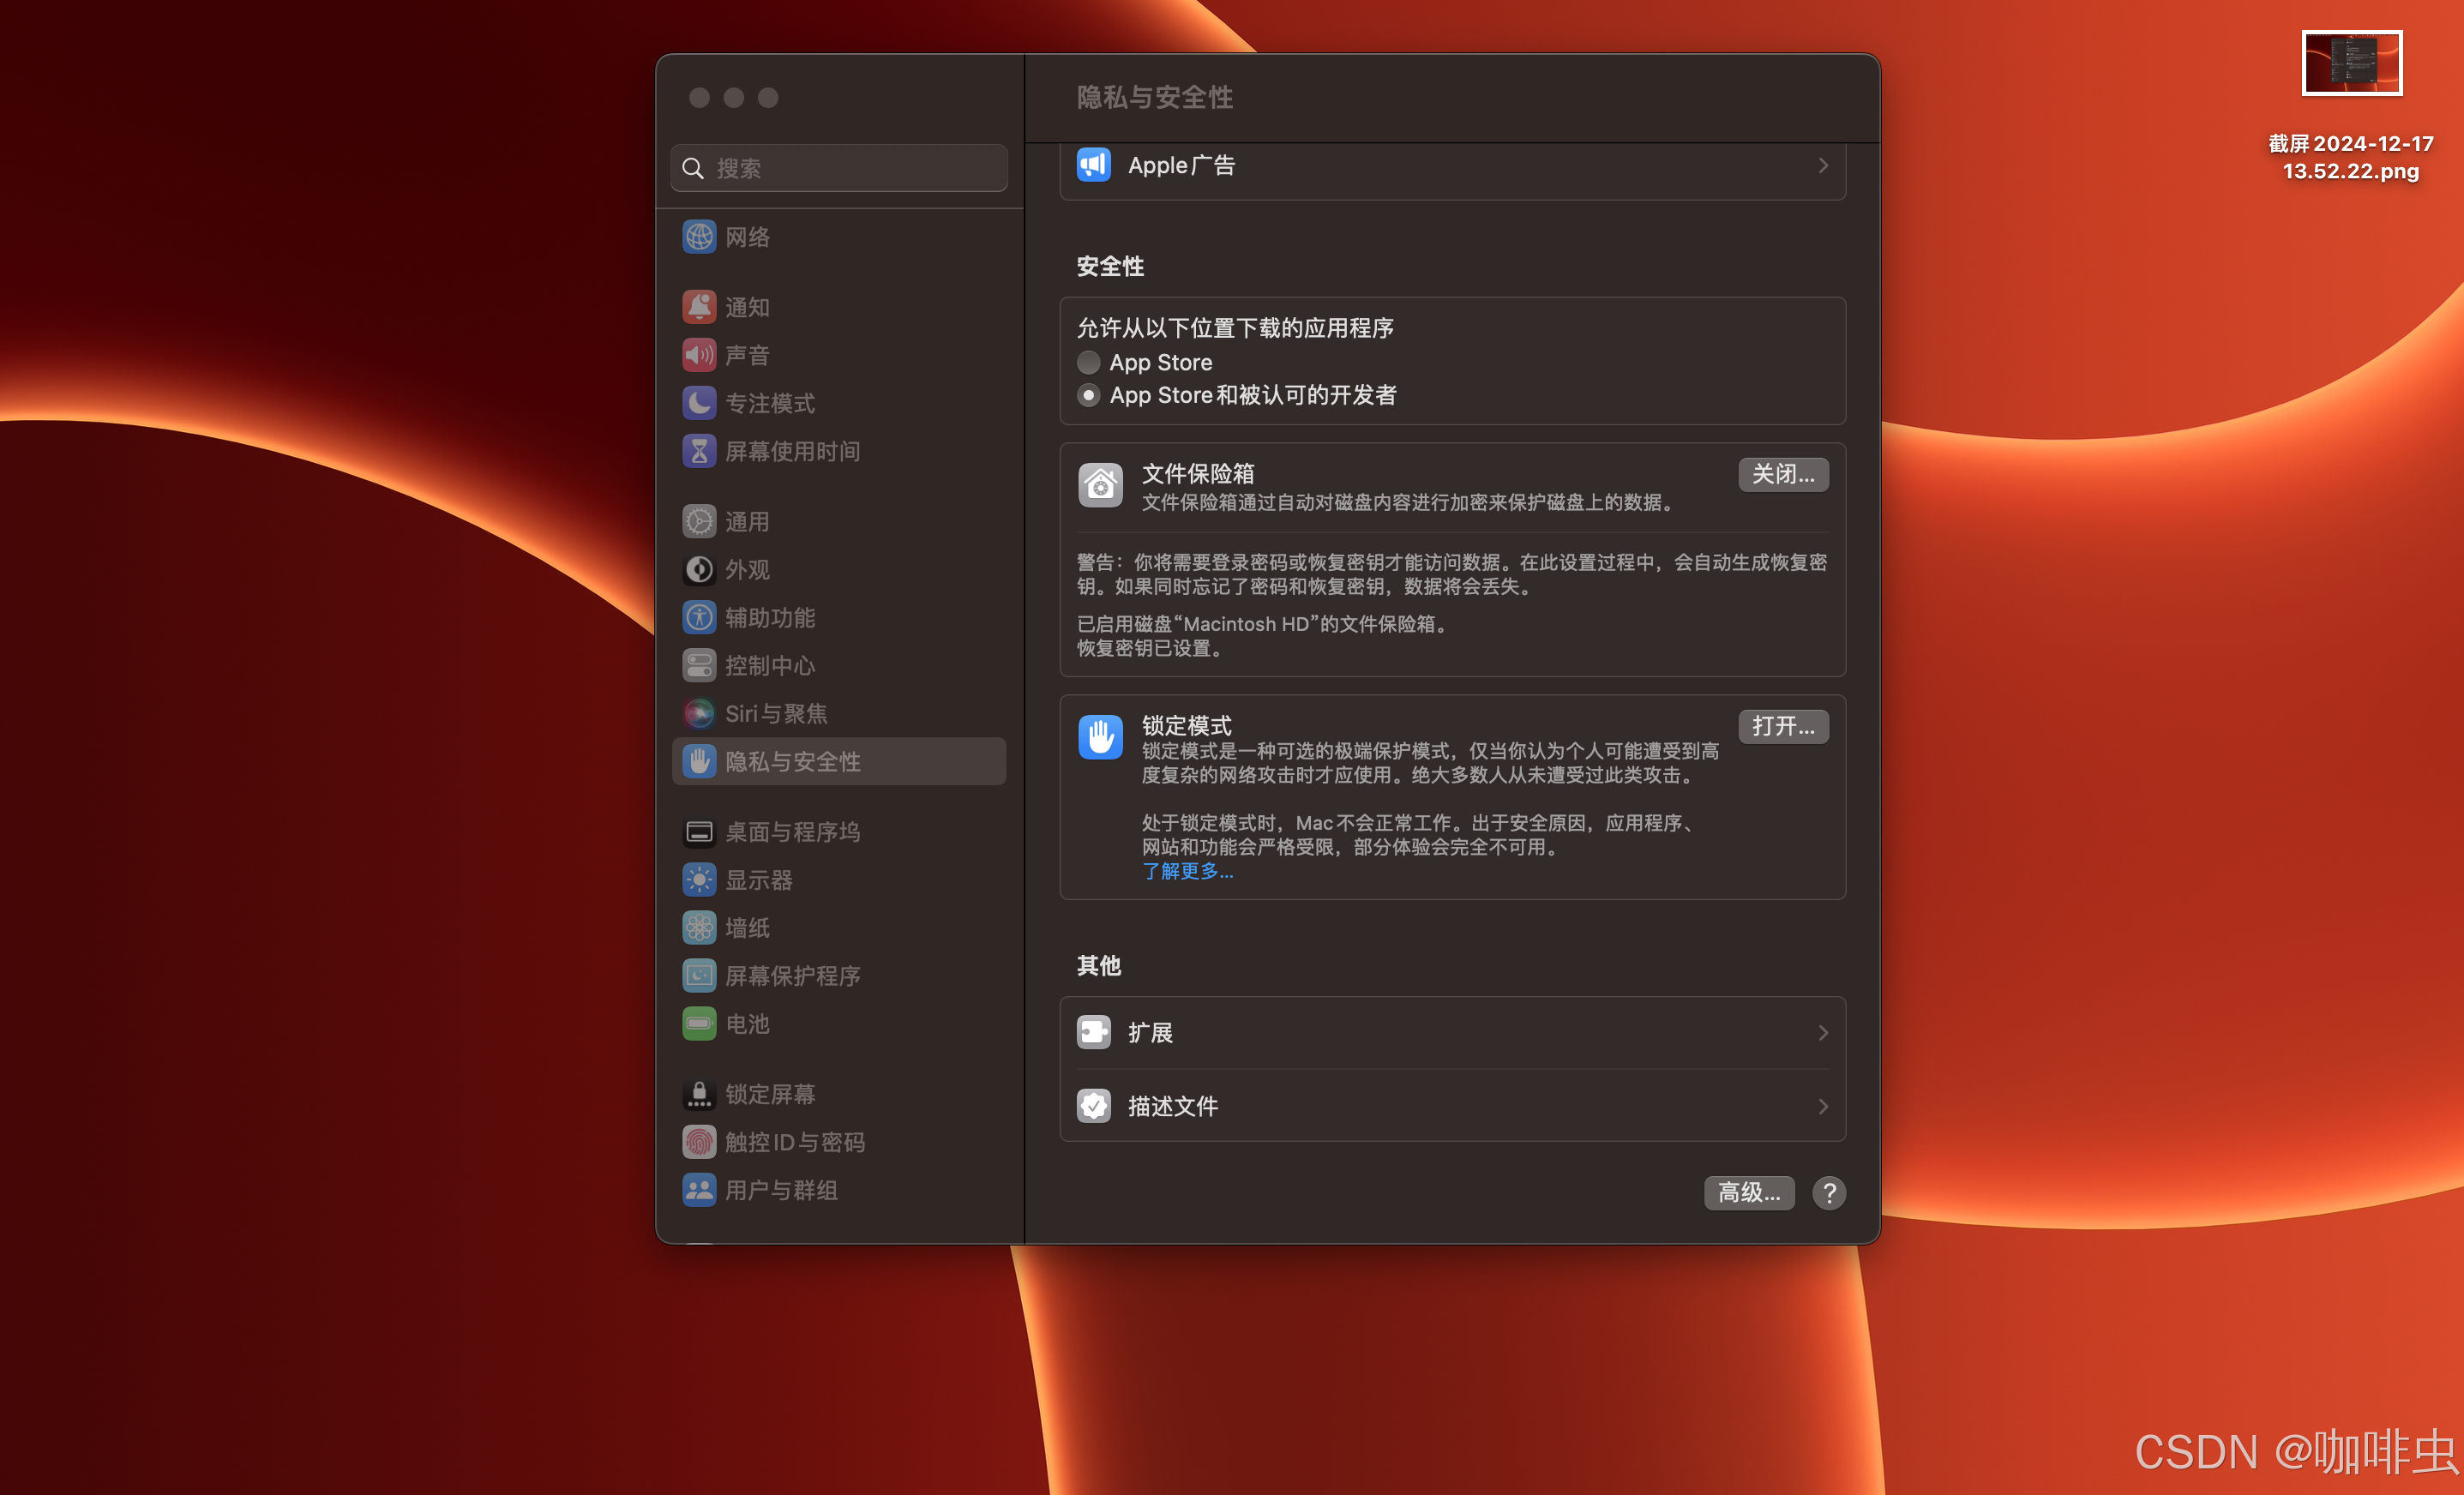
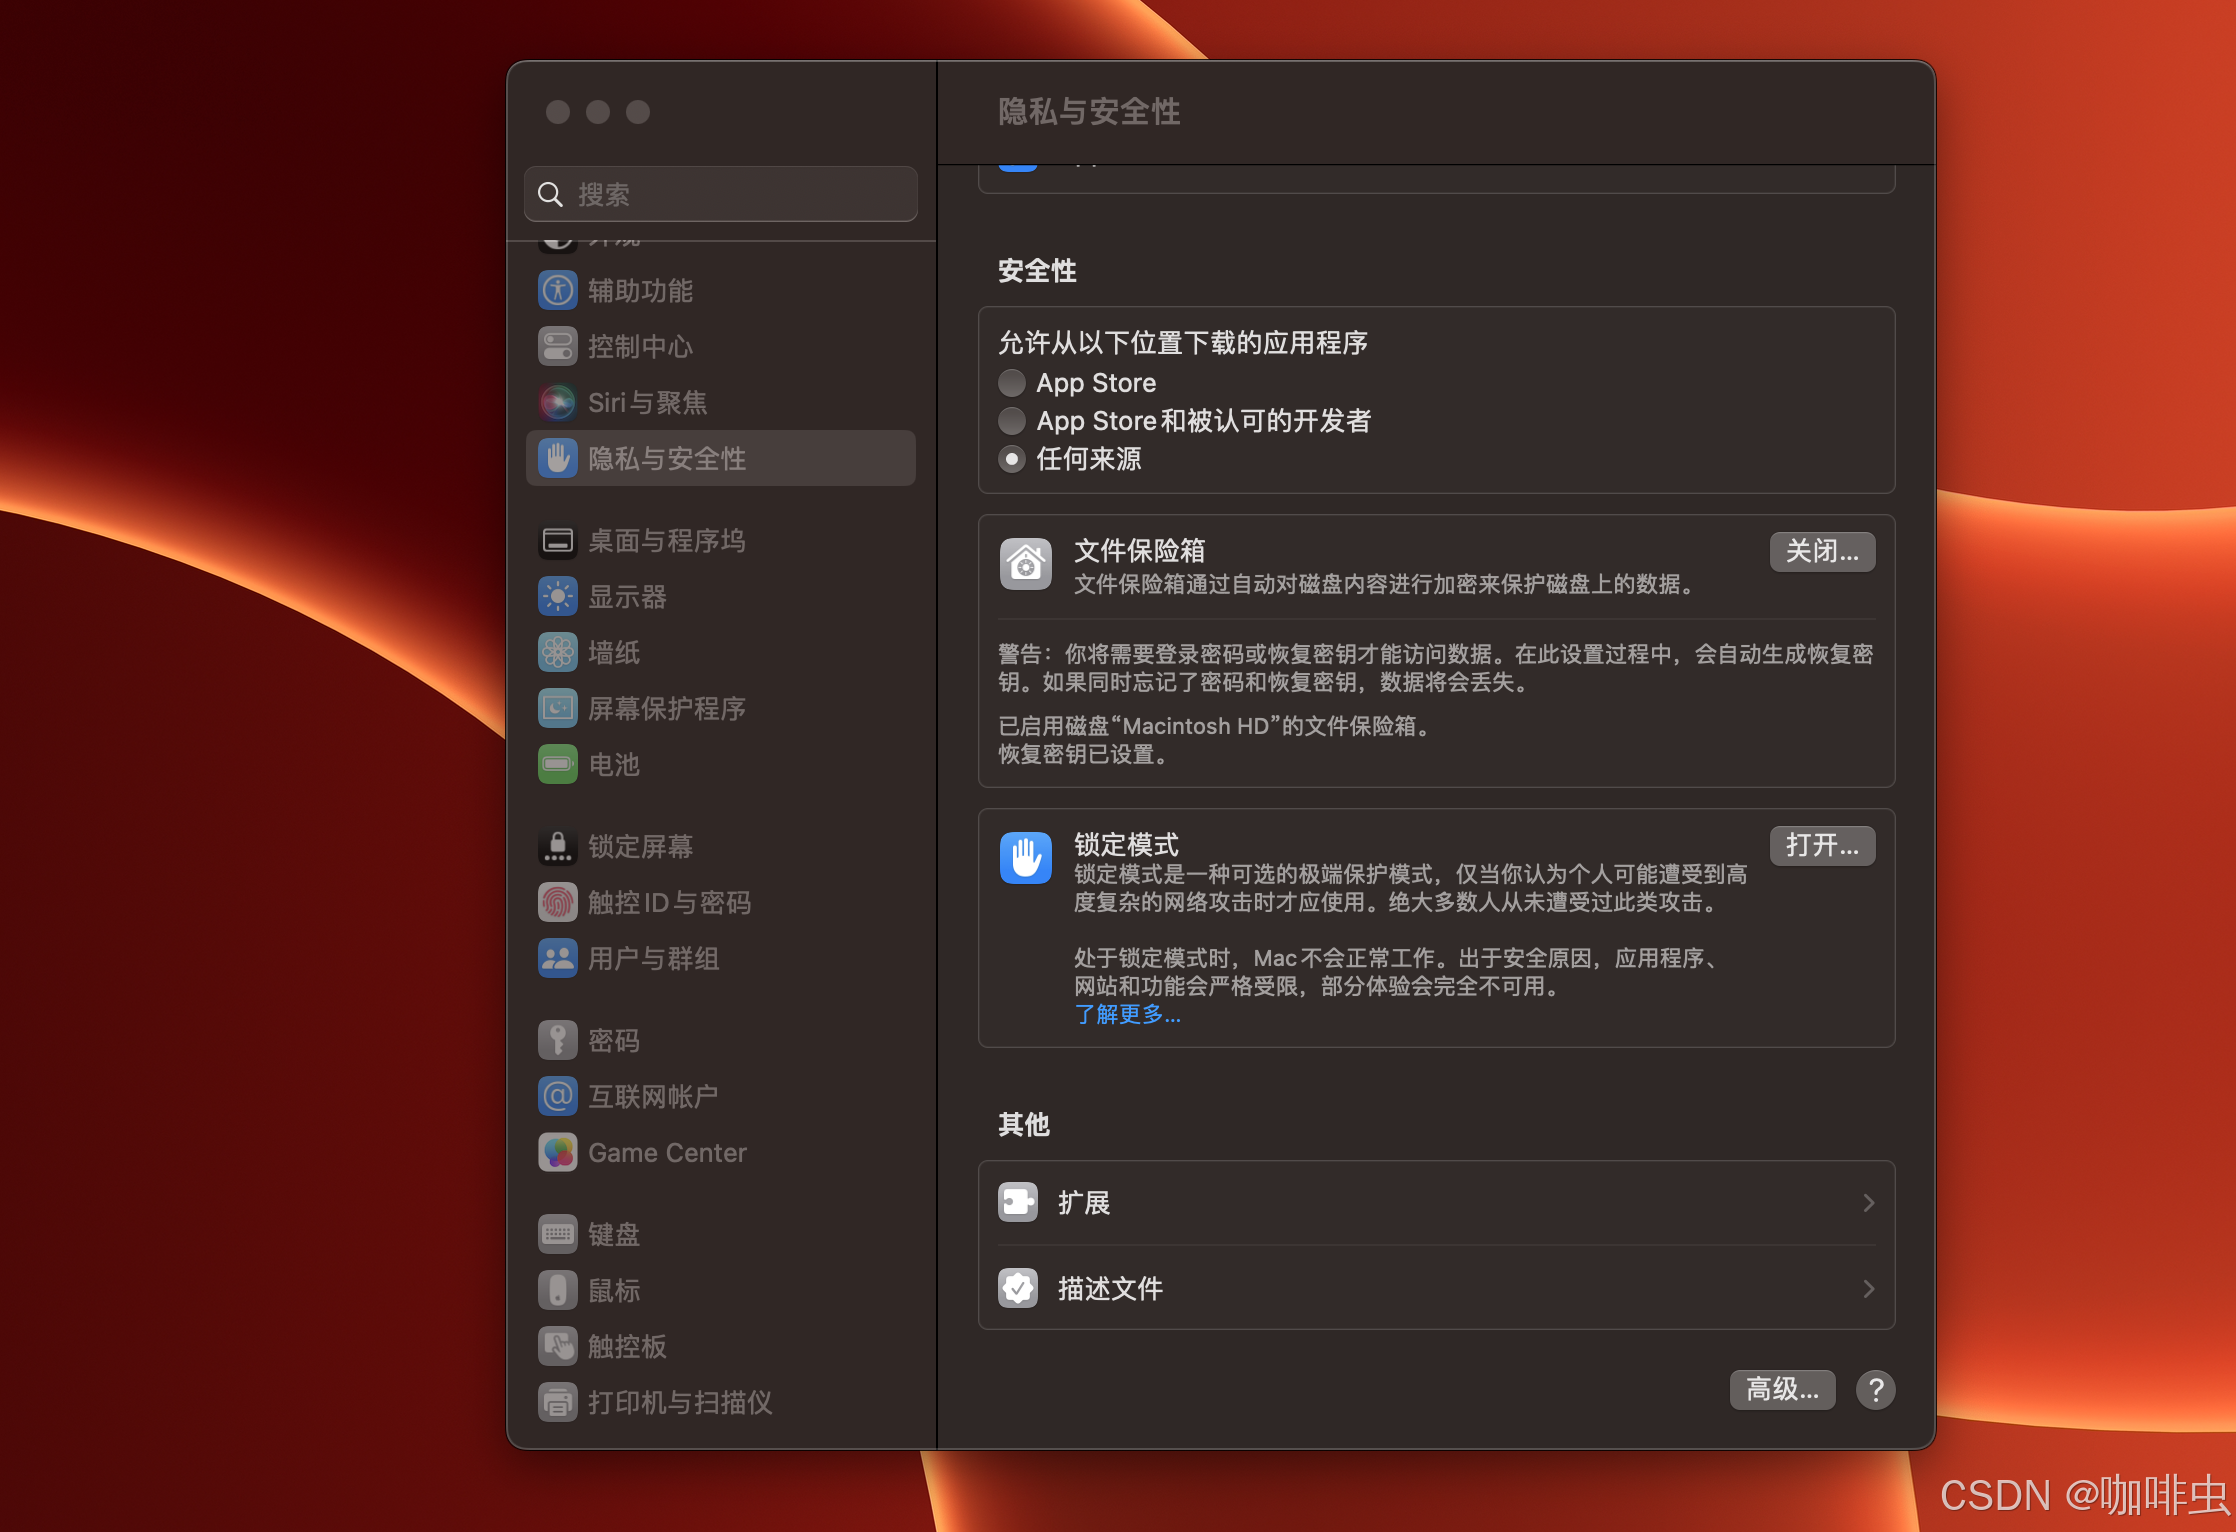
After the command succeeds, the Anywhere option should appear in System Settings > Privacy & Security, indicating that Gatekeeper has been relaxed.
3.2 Fully disable Gatekeeper with --global-disable
If you want to disable Gatekeeper more broadly, use:
sudo spctl --global-disable
After that, macOS stops enforcing Gatekeeper checks globally.
4. Restore the default protection
Disabling Gatekeeper lowers your system's security. Once you finish the install or test you needed, it is a good idea to restore the default behavior.
4.1 Re-enable the main Gatekeeper check
If you used --master-disable, restore it with:
sudo spctl --master-enable
That turns Gatekeeper's main protection back on and blocks untrusted apps again.
4.2 Fully re-enable Gatekeeper
If you used --global-disable, restore the normal behavior with:
sudo spctl --global-enable
5. Security risks to keep in mind
Disabling Gatekeeper increases the risk of installing malware or tampered software. Only do it when you fully trust the app and its source.
If you temporarily disable Gatekeeper, it is smart to pair that with other protections:
- keep FileVault enabled
- avoid running unknown installers casually
- consider antivirus or malware scanning tools
- turn Gatekeeper back on when you are done
6. Conclusion
Gatekeeper exists for a reason, but sometimes you need to step outside the default macOS trust model.
- Use
sudo spctl --master-disableto disable the main Gatekeeper restriction. - Use
sudo spctl --global-disableif you want to disable it more broadly. - When you are finished, restore the defaults with
--master-enableor--global-enable.
The key point is simple: treat Gatekeeper as a safety system you temporarily bypass only when necessary, not as something to leave disabled all the time.
Subscribe to FreeMac
Weekly picks: free Mac software reviews, trusted source updates, alternatives, and low-friction guides.